How to Type Wingdings Symbols in Word
There are two kinds of Wingdings users in Word. The first kind opens the font, types random letters, and deletes the weird ones until something useful appears. The second kind knows exactly which mechanism they’re using — the Symbol dialog, a character code, a quick font swap — and gets the check mark, star, or smiley they wanted in a few seconds flat.
This article is about becoming the second kind. It’s specifically about how to type Wingdings symbols in Word: the mechanics of getting a glyph from the font onto your page. For the bigger picture — formatting symbols, designing with them, and sharing documents safely — see the sibling guide on how to use Wingdings in Microsoft Word. Here, we stay on the keyboard.

A 20-second refresher on what you’re actually typing
Wingdings, Microsoft’s symbol font from 1990 (designed by Charles Bigelow and Kris Holmes of Type Solutions), doesn’t contain letters at all — it contains pictures stored in the slots where letters normally go. When you “type a Wingdings symbol,” you’re really doing one of two things: either you’re typing an ordinary character and telling Word to display it through Wingdings, or you’re asking Word to insert a character by its slot number and setting the font to Wingdings at the same time.
Every method below is a variation on one of those two moves. Once you see that, the methods stop being separate tricks and become one idea with several doors into it.
Method 1: The Symbol dialog (the reliable way)
This is the method to learn first, because it works even when you have no idea which character hides the symbol you want — you can see everything before you insert it.
- Click in your document where the symbol should go.
- Go to the Insert tab on the ribbon.
- At the far right, click Symbol, then More Symbols… This opens the Symbol dialog.
- In the dialog, set the Font dropdown to Wingdings. (You’ll also see Wingdings 2 and Wingdings 3 in the list — separate fonts, separate pictures. Make sure you’ve picked the right one.)
- Scroll the grid until you find your symbol. Click it once to see it enlarged.
- Click Insert, or simply double-click the symbol to drop it straight into the document.
- Click Close when you’re done — or leave the dialog open and click back into the document if you need to insert several symbols in different places.
A few dialog details worth knowing: recently used symbols collect in a row at the bottom, which quietly becomes your personal greatest-hits list. The dialog also shows each selected symbol’s character code — hold on to that detail, because it’s the key to Method 2.
If the symbol you want simply isn’t in the grid no matter how you scroll, it’s probably in one of the sibling fonts, or it isn’t a Wingdings symbol at all. The companion piece on how to find Wingdings symbols in Word turns that search into a system instead of a scroll-fest.
Method 2: Insert by character code
Look again at the Symbol dialog with Wingdings selected. At the bottom there’s a “Character code” box. Each Wingdings picture occupies a numbered slot, and if you know the number, you can jump straight to it: type the code in the box, and the dialog selects that symbol. Press Enter or click Insert, and it’s in your document.
The code system matters most for one famous resident. Slot 252 in Wingdings holds the check mark — and here’s the part that makes it memorable: character 252 in ordinary text is the letter ü. That’s why the check mark is sometimes called “the ü trick.” Type a ü, format it in Wingdings, and a check mark appears — because you’re displaying character 252 through a font that draws a tick in that slot.
So there are two ways to use the code:
- In the dialog: Font set to Wingdings, type 252 in the Character code box, Insert. Clean, explicit, recommended.
- By font swap: Type ü in your normal way (or insert it via Insert > Symbol in your regular font), select it, and change the font to Wingdings.
Microsoft’s support page on inserting symbols and characters documents the dialog and its code box officially, and the general background on the font is at Wikipedia’s Wingdings article.
A word of restraint about codes: apart from the check mark at 252, this article deliberately isn’t going to hand you a long list of “code X equals symbol Y” claims. Long lists circulating online are frequently wrong, mix up Wingdings with Wingdings 2, or describe one specific Word version’s behaviour. The dialog itself is always the truth — select the symbol and Word shows you its real code, in your version, with your fonts. Trust the grid, not a stranger’s chart.
Method 3: Type the letter, then swap the font
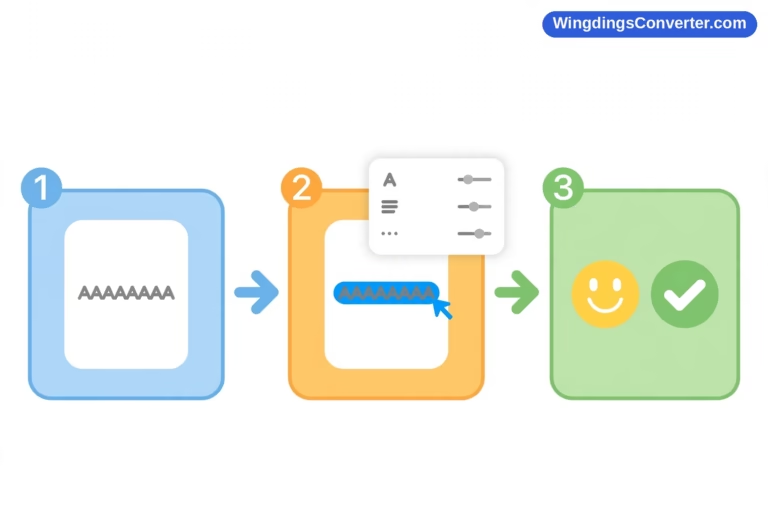
The fastest method once you know a few mappings by heart:
- Type the character in your normal font.
- Select it.
- Change the font to Wingdings (Home tab font dropdown, or Ctrl+Shift+F).
The mappings worth memorising are few, famous, and safe:
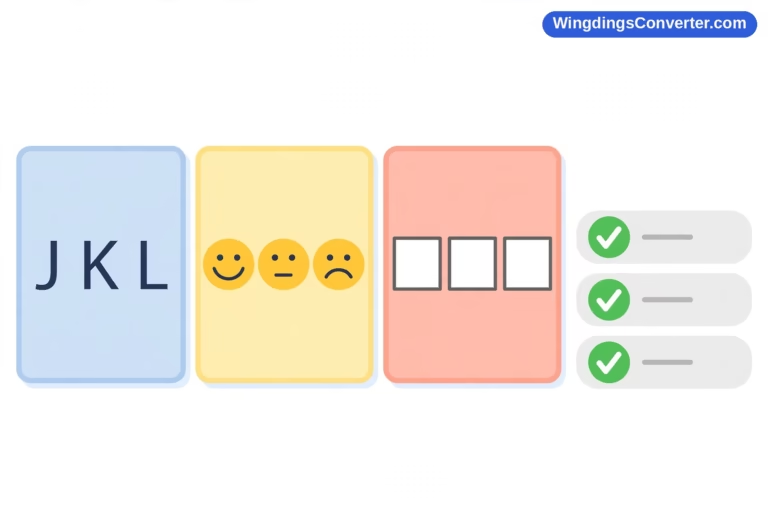
| Type this | In Wingdings you get |
|---|---|
| J | Smiling face |
| K | Neutral face |
| L | Sad face |
| ü (character 252) | Check mark |
That’s a genuinely useful little set — the faces are handy for feedback forms and simple surveys, and the check mark is the single most-used Wingdings glyph in business documents. For everything beyond these four, use the Symbol dialog rather than guesswork. Random-key exploring is fun for five minutes and maddening for fifty.
You can, of course, run the process in reverse to read someone else’s Wingdings: select the symbol, change the font back to something normal, and the underlying letter reappears. And if you’ve received an entire passage in Wingdings, doing this letter by letter is nobody’s idea of a good afternoon — paste it into the Wingdings converter instead and translate the whole thing at once.
Method 4: Give your favourites a shortcut
If you insert the same symbol twenty times a week, the dialog becomes a toll booth. Word gives you two ways around it.
Assign a keyboard shortcut
In the Symbol dialog, select your symbol, then click the Shortcut Key… button. Press the combination you want to use — something unused, like Alt+Ctrl+C for a check mark, if it’s free — then click Assign. From then on, that keystroke inserts the symbol directly, already formatted. This works because Word records the shortcut against that specific character in that specific font, which is exactly what a Wingdings symbol is.
Use AutoCorrect as a symbol typer
The other route: select a Wingdings symbol you’ve already inserted in a document, then go to File > Options > Proofing > AutoCorrect Options. The symbol will be sitting in the “With” field if it’s selected when you open the dialog — give it a memorable “Replace” text like \tick or (check), and confirm. Now typing that code in a document and pressing space or punctuation swaps in your symbol automatically.
Two cautions with AutoCorrect. First, choose trigger text you’d never type naturally — check alone will ambush you in ordinary sentences. Second, keep in mind these entries live in your copy of Word. They’re a personal productivity setup, not part of the document, so they won’t follow the file to a colleague’s machine.
On a Mac? Read this bit first
Word for Mac includes Wingdings as part of Office, and the Symbol route works — look for Insert > Advanced Symbol in the Mac version’s menus, then choose Wingdings from the font list. The font-swap method works identically too: type the character, select it, apply Wingdings.
Where Mac users trip up is outside Word. Built-in Mac apps and other editors may not include Wingdings at all, so a passage that looks perfect in your Word document can fall apart when pasted elsewhere. That broader Mac picture is covered in how to use Wingdings on Mac.

Troubleshooting: when typing doesn’t produce symbols
“I changed the font but I still see letters.” Then the font isn’t actually Wingdings — check you didn’t select Wingdings 2 or 3 (different pictures, including possibly blank-looking slots), and make sure the character itself is selected when you apply the font. Formatting applies to the selection or to what you type next, not retroactively to the whole paragraph.
“The Symbol dialog doesn’t list Wingdings.” The font is missing from that machine — rare on Windows with Office, possible on stripped-down or non-Microsoft setups. Our guide on how to install Wingdings font on Windows covers restoring it, and the Wingdings font download page can help too.
“My symbol changed when I sent the document.” Not a typing problem — a portability one. The recipient’s device lacks the font, so they see the underlying letter. Send a PDF, or swap the symbol for its real Unicode counterpart (a true ✓ is U+2713) if the document needs to work everywhere.
Frequently asked questions
What is the quickest way to insert a Wingdings check mark in Word?
Open Insert > Symbol > More Symbols, set the font to Wingdings, type 252 in the Character code box, and click Insert. Or type a ü, select it, and set its font to Wingdings — same slot, same tick. If you do it daily, assign it a keyboard shortcut from the Symbol dialog and skip the dialog entirely.
Can I just type Wingdings symbols from the keyboard without the dialog?
Yes — that’s the font-swap method. Switch your font to Wingdings first and type, or type in your normal font and reformat afterwards. The well-known mappings are J for a smiling face, K for a neutral face, L for a sad face, and ü for the check mark. Beyond those, the dialog is more reliable than memorised charts, because Wingdings, Wingdings 2, and Wingdings 3 all assign different pictures.
Why does my Wingdings symbol show as a letter when I paste it somewhere else?
Because underneath, it is a letter. Wingdings symbols are ordinary characters displayed through a picture font, and pasting usually drops the font or lands in an app that doesn’t have it. The picture vanishes and the character remains. For symbols that must survive travel, use genuine Unicode symbols instead — they carry their identity in the character itself.
How do I create a keyboard shortcut for a Wingdings symbol?
Open the Symbol dialog, set the font to Wingdings, and click the symbol. Click Shortcut Key…, press the combination you want, and click Assign. Word stores it for that font-and-character pairing, so the shortcut always produces the symbol properly formatted.
What’s the difference between Wingdings in the Symbol dialog and regular symbols?
In the dialog, Wingdings sits in the font list alongside normal fonts, but its “characters” are the letter slots dressed as pictures. A regular symbol — say a © or a ✓ in a standard font — is a true Unicode character with its own code point, like U+00A9 for © or U+2713 for ✓. Same dialog, two very different kinds of thing, which is why one travels between devices happily and the other often doesn’t.
Does the ü check mark trick work in other programs?
Anywhere the real Wingdings font is available and you can apply it to text — other Office apps, for instance — yes, character 252 displays as a check mark. In apps without the font, you’ll simply see a ü. The trick is a property of the font, not of Windows or Word specifically.
Conclusion
Typing Wingdings symbols in Word comes down to one idea — a picture stored in a character’s slot — and whichever door into it suits the moment. Browse and double-click in the Symbol dialog when you’re exploring. Jump by character code, especially 252 for the check mark, when you know your target. Swap the font when you’re working with the famous few mappings, and promote true favourites to a shortcut or AutoCorrect entry so they cost you one keystroke. Do that, and Wingdings stops being a slot machine and becomes what it should be: a fast, predictable way to get exactly the symbol you meant.