How to Find Wingdings Symbols in Word
If you’ve ever opened Word, switched to Wingdings, and then just stared at the keyboard wondering where everything actually is — you’re not alone. Learning how to find Wingdings symbols in Word is less about memorizing letters and more about knowing where Word hides its symbol tools. Once you know the Symbol dialog, the character codes, and the little shortcuts Word keeps for you, finding the exact symbol you want takes seconds instead of ten minutes of random typing.
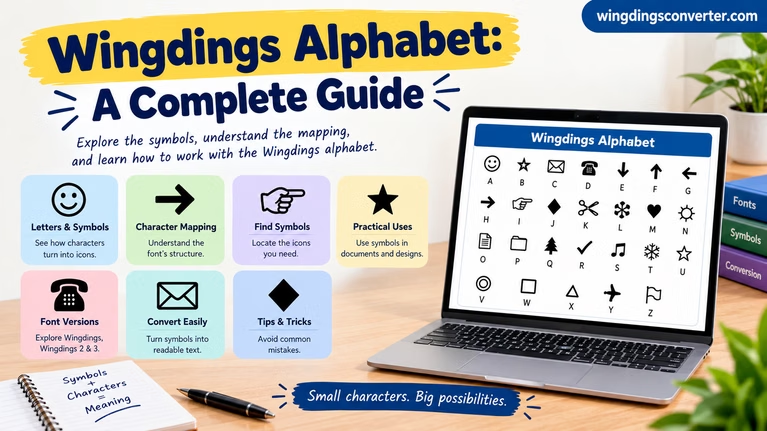
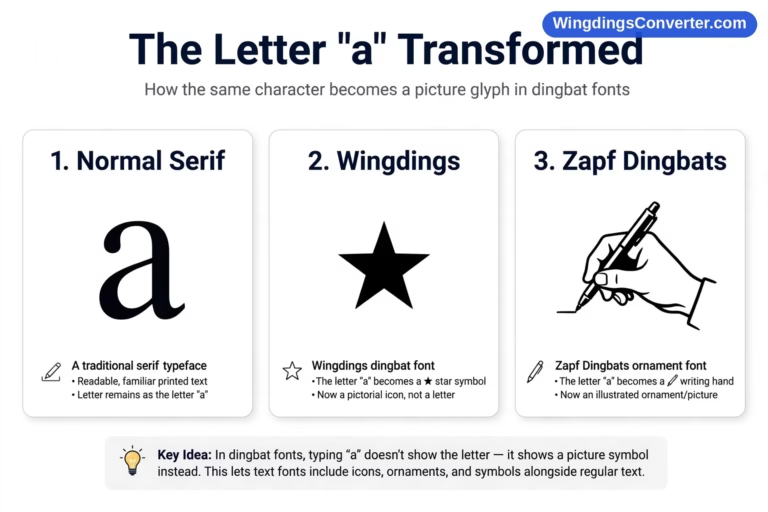
Wingdings itself is simple underneath. It maps ordinary keyboard characters — letters, numbers, punctuation — to pictures. Type a capital J with Wingdings applied and you get a smiling face. Type L and you get a sad face. The document doesn’t store a picture, it stores the letter plus the font name. That’s why the browsing tools in Word matter so much: you’re really browsing a font, character by character.

Where Wingdings Lives in Word
Word doesn’t put Wingdings in one single place. You have the quick Symbol gallery on the ribbon, the full More Symbols dialog where the real browsing happens, and a couple of typing shortcuts once you know a code. Most people only ever find the first one, get frustrated by how short the list is, and give up.
Start with the basics. On Windows and on the Mac version of Word, go to Insert > Symbol. You’ll see a small row of recently used or commonly offered symbols. If Wingdings is what you want, that little gallery won’t be enough. Click More Symbols… at the bottom. That’s the dialog this whole guide revolves around — it’s where you can pick the font, scroll the entire set, search by code, and insert without closing the window.
If you’re using Word on the web, the options are thinner. The web version shows a smaller symbol picker and it doesn’t give you the same full font browsing experience as the desktop app. If you need to browse the complete Wingdings set, desktop Word is still the easiest place to do it. Our broader guide to how to use Wingdings in Microsoft Word covers the setup differences in more depth.
The quick Symbol gallery vs. the full dialog
The gallery on the ribbon is handy when you already know the symbol you need is in your recent history — maybe a check mark you inserted five minutes ago. It’s fast, it’s one click, and then you’re done.
The full dialog is different. It lets you:
- Change the font to Wingdings, Wingdings 2, or Wingdings 3
- Scroll a grid of every glyph in that font
- Jump straight to a character if you know its code
- See what keyboard character a glyph is mapped to
- Double-click to insert several symbols without reopening anything
Think of the gallery as a shortcut and the dialog as the library. You need the library.
How to Find Wingdings Symbols in Word Using the Symbol Dialog
Here’s the step-by-step that works in current desktop versions of Word for Windows. The Mac steps are almost identical.
- Place your cursor where you want the symbol to go.
- Go to Insert > Symbol > More Symbols…
- In the dialog that opens, find the Font dropdown at the top. Click it and type “Wingdings” or scroll to it. The grid underneath changes instantly to show Wingdings glyphs instead of normal letters.
- Scroll the grid, click once on the symbol you want to preview it, and check the bottom of the dialog. Word tells you the character code and, for many symbols, a description.
- Double-click the symbol to insert it, or click once and then click Insert. The dialog stays open, which is useful — you can insert three or four symbols in a row, then click Close when you’re finished.
That last point catches people out. If you click Insert and immediately close the dialog every time, browsing feels painfully slow. Leave it open while you build a small string of symbols — a row of stars, a set of arrows for a handout, whatever you need — and only close it when you’re done.
Once a symbol is inserted, it behaves like a regular character. You can make it bigger, change its colour, bold it, or copy it elsewhere in the document. It’s still a letter underneath, just wearing Wingdings clothing. That underlying detail explains a lot of weird behaviour later, especially when files move between computers. If that ever bites you, our guide to why Wingdings symbols change when copied explains what actually travels when you copy and paste.
Switching between Wingdings, Wingdings 2, and Wingdings 3
A lot of “I can’t find it” moments aren’t a Word problem at all. The symbol exists — it’s just in a different Wingdings font.
Microsoft ships three related fonts: the original Wingdings from 1990 by Charles Bigelow and Kris Holmes, plus Wingdings 2 and Wingdings 3. They don’t repeat each other. Wingdings 2 leans into more office-style and hand-like glyphs, pointers, and numbered shapes. Wingdings 3 is mostly arrows in every direction and weight you could imagine.
So if you’re hunting for a very specific arrow and the original Wingdings grid doesn’t have it, don’t keep scrolling the same set harder. Change the Font dropdown to Wingdings 3 and look again. The same goes for Webdings, the companion font from 1997, which has its own set — we compare them directly in Wingdings vs Webdings: what’s the difference.
In the Symbol dialog, switching fonts is instant. No need to close anything. Pick the new font and the grid redraws.
Finding a Symbol When You Know Its Character Code
Scrolling is fine for a first explore. It gets tedious fast when you know exactly what you want.
Every character in Word has a code. In the Symbol dialog there’s a Character code box at the bottom right, along with a dropdown that usually says “from: Unicode (hex)” or “ASCII (decimal)”. For classic Wingdings work, you’ll mostly use decimal codes or you’ll just type the letter you need.
A safe example: the check mark that a lot of people look for in Wingdings is character code 252, the ü character. With Wingdings applied, that code shows as a bold check mark. You can jump to it in the dialog by selecting Wingdings in the Font dropdown, setting the “from” field appropriately, and typing the code. The grid highlights the glyph so you can confirm before inserting.
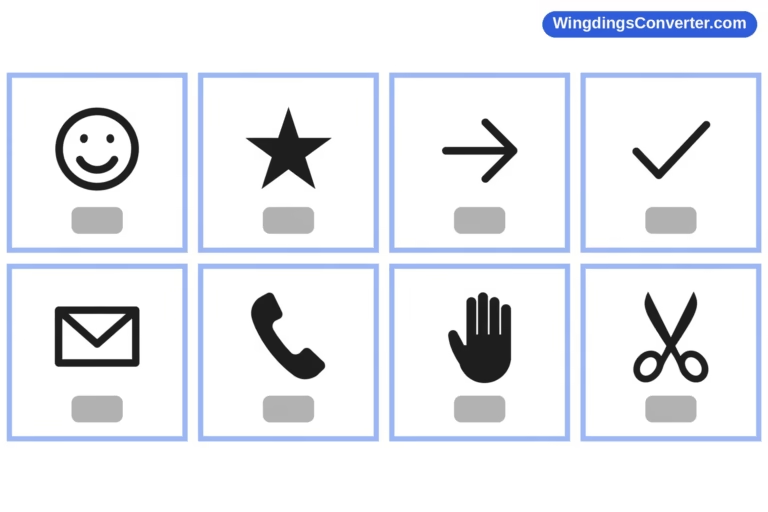
You can also type directly in the document if you’re confident. Type the underlying character, select it, and change its font to Wingdings. The classic face trio is the easiest way to test this: J becomes a smiling face, K becomes a neutral face, and L becomes a sad face. If you type those three letters, highlight them, and apply Wingdings, you’ll see instantly whether the font is working.
Microsoft’s own documentation on inserting ASCII or Unicode symbols and characters walks through the code-entry method for documents more generally, and it’s worth bookmarking if you use codes a lot.
Using Alt codes and the Character Map as a backup
Outside the Symbol dialog, Windows has one more browsing tool: Character Map. Search for “Character Map” in the Start menu, pick Wingdings in its font list, and you get another grid view. It’s older and a bit clunkier, but it has one advantage — you can see several fonts side by side across different windows if you’re comparing something.
I wouldn’t make Character Map your everyday method in Word, because you’ll have to copy from it and paste into your document, which introduces exactly the formatting headaches you don’t want. Use the Symbol dialog inside Word when you can. Keep Character Map as a plan B for checking whether a glyph exists at all.
The Recently Used Row — Word’s Quiet Time-Saver
At the bottom of the Symbol dialog there’s a row labelled Recently Used Symbols. Word remembers what you’ve inserted lately, across documents in the same session and often beyond it.
This sounds minor until you’re building something repetitive — say, a checklist for a classroom worksheet where you need the same check mark and the same empty box forty times. The first time, you browse the full grid. After that, both symbols are sitting in Recently Used, one click away. No scrolling, no codes.

A few habits make this row even more useful:
- Build a starter document. Create a blank page with your favourite Wingdings symbols inserted once each — faces, check mark, a few arrows, a star — labelled in normal text underneath. Whenever you start a new project, copy from there. It’s your personal chart.
- Don’t clear your history on purpose. There’s no prize for a tidy Recently Used row. Its whole value is that it remembers your taste.
- Check the row first. When you reopen the dialog, glance at Recently Used before you touch the font dropdown. Half the time what you need is already there.
Creating your own printable Wingdings chart in Word
If you work with students, design handouts, or just like having a reference on paper, you can make your own chart in about ten minutes — and it’s more useful than most charts you’ll find as images online, because yours will only include the symbols you actually use.
Make a simple table, two columns wide. In the left column, type a letter or character in a normal font like Calibri so you can read it. In the right column, type the same character and apply Wingdings to just that cell. Repeat row by row. Print it and pin it near your desk.
The advantage is honesty. A downloaded chart might show symbols from a slightly different font version, or include glyphs you’ll never touch. Your own chart reflects your Word, your fonts, your work.
Browsing by Subset and Searching Smarter
Here’s a place where expectations need adjusting. In the Symbol dialog, when you pick a normal text font like Calibri or Times New Roman, you’ll see a Subset dropdown that lets you jump to sections like “Currency Symbols” or “Mathematical Operators”. Those subsets are a Unicode idea — Unicode organizes characters into blocks.
Wingdings predates that neat organization in the way Word presents it. When Wingdings is selected, you won’t get the same helpful subset breakdown. The font lives in its own mapped range, so Word mostly just shows you the grid as-is. Don’t waste time hunting for a Subset menu that isn’t coming. For Wingdings, browsing means the grid plus character codes, not subsets.
That said, there are smarter ways to browse than starting at the top-left corner every single time:
- Think in neighbourhoods. Similar glyphs tend to sit near each other in the grid — faces together, arrows in runs, office objects clustered. Once you find the general area for one symbol in a family, neighbours are usually close.
- Enlarge the dialog. You can drag the corner of the Symbol dialog to make it bigger. A bigger grid means less scrolling and larger previews, which really helps with detailed glyphs.
- Click slowly and read the footer. Single-clicking a glyph shows its code and name at the bottom. Read it before inserting. It prevents the classic mistake of inserting something that looked right at small size and is completely wrong at 18pt.
- Test at real size. Insert the symbol, close the dialog, and bump the font size up. Some Wingdings glyphs look charming at large sizes and muddy at 10pt. If it’s going into a heading or a poster, check it the way readers will actually see it.
And if browsing inside Word still feels slow for a big job, that’s a legitimate feeling. An online tool can be faster for converting a whole phrase: type normal text, see it in Wingdings instantly, then bring the result back into Word. The tool on our homepage does exactly that, and our guide to how to translate Wingdings symbols explains the two-way process.
What to Do When the Symbol You Want Isn’t in Wingdings
Sometimes you do everything right — dialog open, font selected, full grid scrolled — and the symbol simply isn’t there. Before you assume Word is broken, consider three normal explanations.
First, it might be in Wingdings 2, Wingdings 3, or Webdings, as we covered above. Check those before giving up.
Second, it might be a proper Unicode symbol rather than a Wingdings glyph at all. Modern Word handles thousands of real symbols — check marks, arrows, hearts, stars — that exist as their own characters, independent of any one font. Those are actually better for sharing, because they don’t fall apart on a phone or a Mac without Office. If portability matters, look for the Unicode version instead. We break down the trade-off in Wingdings vs Unicode: what’s the difference.
Third, you might be remembering a symbol from a different program or a different era slightly wrong. Fonts get revised, memory blurs, and a glyph you swear was a Wingdings clock might have been from another dingbat font entirely. A quick browse of the full set usually settles it — either you’ll spot it and feel relieved, or you’ll confirm it’s genuinely not there and you can stop searching.
If symbols that definitely used to be there have vanished from a document you already made, that’s a different problem — font missing on this machine, substitution, that kind of thing. Start with why are my Wingdings symbols missing rather than re-browsing.
Quick Checks If Wingdings Doesn’t Appear in the Font List
Every now and then someone opens the dialog and Wingdings isn’t even offered. On a standard Windows machine with Office installed, Wingdings ships with the system — it has since the early 1990s, when Microsoft introduced it in 1990 — so its absence is a clue, not a mystery.
Check whether other Office apps see it. If PowerPoint shows Wingdings but Word doesn’t, the issue is narrower than a missing font. If nothing sees it, the font itself may be damaged or removed, and repairing Office is the usual fix. Our dedicated troubleshooting guide, why is Wingdings not working, works through that checklist step by step, and how to install the Wingdings font on Windows covers reinstalling it cleanly.
On a Mac, remember the nuance: Wingdings is not built into macOS itself. It arrives with Microsoft Office for Mac. A Mac without Office won’t list it at all, which is expected behaviour, not a fault.
Frequently Asked Questions
How do I open the full list of Wingdings symbols in Word?
Go to Insert > Symbol > More Symbols…, then choose Wingdings in the Font dropdown at the top of the dialog. The grid below shows the complete set. Double-click any glyph to insert it, and leave the dialog open if you need several at once.
Is there a way to search Wingdings by name in Word?
Not in the way you’d search a modern emoji picker. Word’s dialog lets you jump by character code and browse the grid, but it doesn’t offer a reliable keyword search like “type ‘heart’ to find hearts” for Wingdings. Knowing a code, or using Recently Used after your first insert, is the fastest route.
Why do I see letters instead of symbols after I insert one?
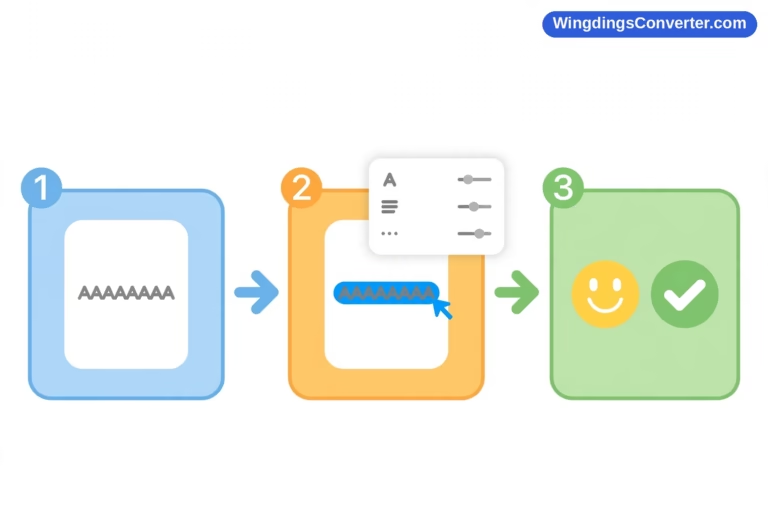
Because a Wingdings character is a letter wearing a font. If the selection loses the Wingdings formatting — after a paste as plain text, for example — it reverts to showing as a plain letter. Re-select the character and reapply Wingdings, or re-insert it from the dialog.
Where is the check mark in Wingdings in Word?
In the Symbol dialog with Wingdings selected, look for character code 252. That’s the classic bold Wingdings check mark. Once you’ve inserted it once, it will live in your Recently Used row for quick access next time.
Can I use Wingdings symbols in Word on a Mac?
Yes, if you have Microsoft Office for Mac installed, because Office brings the font with it. In Word for Mac the route is similar: Insert > Symbol, then browse with Wingdings selected. A Mac without Office won’t have the font built in.
What’s the difference between Wingdings and the symbols in other fonts?
Normal symbol characters in fonts like Calibri or Segoe UI Symbol are real Unicode characters — the character itself is the symbol. Wingdings characters are ordinary letters displayed as pictures through the font. That difference is invisible while you browse, but it matters a lot when you share the file.
Conclusion
Finding Wingdings symbols in Word stops being frustrating the moment you stop relying on the tiny ribbon gallery and start living in the More Symbols dialog. Pick the font, browse the grid, lean on character codes for the symbols you use often, and let Recently Used do the remembering for you. And when a symbol truly isn’t in Wingdings, check its sibling fonts or reach for a proper Unicode symbol instead — you’ll save yourself a long, pointless scroll. A small personal chart, printed or saved as a starter document, ties it all together. Ten minutes of setup, and you’ll never hunt blindly for a glyph again.